I’m gonna kick off my series on the Colorado Trail with this gentle introduction.
The CT is 486 miles (782 km) long. It’s got about 22000 meters of climbing. The route is split into 28 segments – making it easier to judge progress and not feel overwhelmed by the sheer enormity of what you’ve gotten yourself into while in your tent after the first day.
The trail connects the cities of Denver and Durango. Denver is the recommended starting point. You can go the other way, but it’s considered tougher, as you jump right into the high elevation segments.
By bike you’re not allowed into wilderness areas. You’ll have to take detours – 7 of them. There are recommended routes for each of one. Best place to read about them is in the Colorado Trail Data Book. It’s got all you need to know while on the trail – where to find water (most important!), where to camp, trail topography, which way to go at each junction, towns along the way and what facilities you can expect to find there. Complete with detours, the bike route is 539 miles long.
Here’s the bikepacking.com article on the trail. They give it a 9 out of 10 in terms of difficulty – sounds about right. Their exact words are “one of the longest, more arduous, yet most rewarding bikepacking routes in the US”. They estimate it’s 55% singletrack – wohoo! They also judge it’s about 92% rideable. I guess that’s true – if you’re doing it as a series of day rides. But all in one go, with all your gear on, it’s way harder. In the second half of the trip I found myself push biking on most of the climbs.
The weather can be quite challenging. From what I’ve read, it rains each afternoon during most of the summer. Thunderstorms are not fun when you’re high up in exposed terrain. Up to around June, parts of the trail are covered by snow. Starting from August, rains become less frequent, but temperatures start dropping. From September you’ll have a pretty good chance of snow (although it can snow any time of the year). After all, you’re climbing to just over 4000 meters elevation.
Let’s move on to the equipment. I pondered a lot on what to take on the trip. After you leave from the Waterton Canyon trailhead just outside Denver, it’s about 4-5 days until the next place where you can resupply. So if anything you may need is missing, uncomfortable, or breaks, .. well, sucks.
Bike
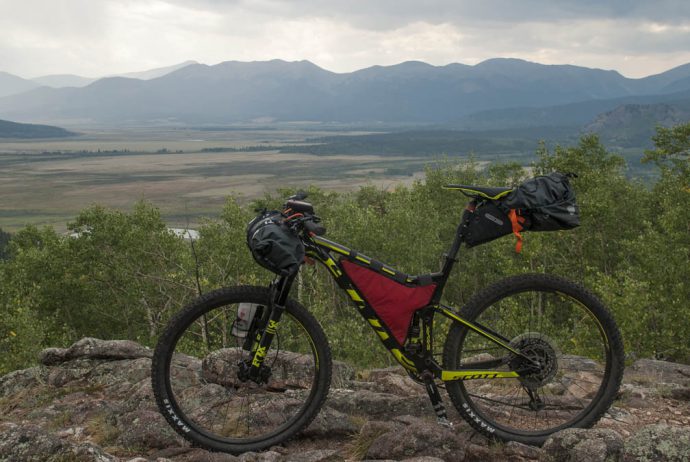
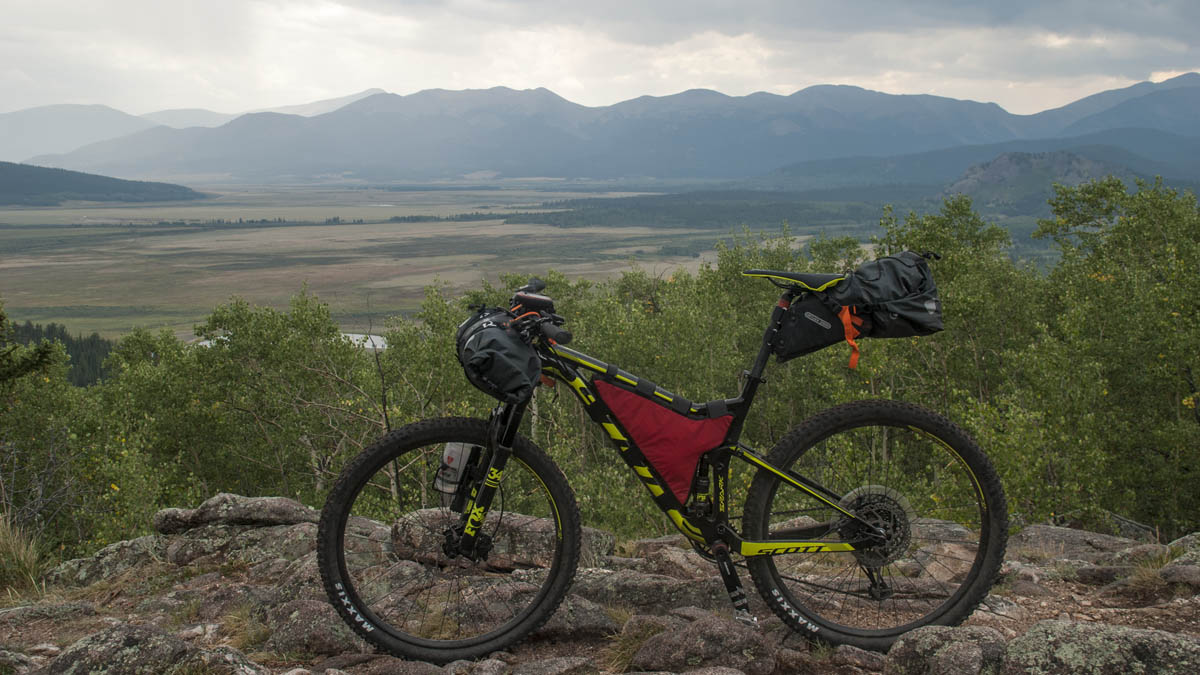
Meet Kenosha! She’s a Scott Spark 940 2018. The aluminum frame, 2.35″ tires and dropper post are not on the light side, leading to an official weight of 13.4 kg. 120 mm of travel front and back, with a simple to use handlebar lockout controlling both of them at once – sweet! Sram GX transmission, with 12 gears and a 10-50 cassette. 180 mm discs front and back.
Changed the original 32t chain ring with an oval 30t one. Switched the dropper with a fixed post in order to install the seat bag. Went for a tubeless setup. Those were all the changes I’ve made to the bike.
I guess it’s not very wise that your first ride with a new bike is a 900 km one. But logistically I had no other option. What’s the worst that can happen? is what I asked myself, trying to remain positive, while keeping my fingers crossed.
Bike bags
The handlebar and seat post bags are from Ortlieb. I’ve used them on a few trips in Romania, so I knew they’re reliable and I’ll have no surprises here.
The frame bag needed to be custom built for this bike. Since first arriving in Denver and measuring the frame until leaving on the trail I had two weeks. I was glad to see the guys from Rogue Panda were able to build and deliver the bag in time. And it fit like a glove.
Due to the frame bag, I had to find another place to install my water bottle. Using the Topeak Versa Mount I fixed the bottle cage to the fork. I also needed a backpack to hold my DSLR, any extra water and whatever I wanted to have easy access to.
Tent
Ideally you’d carry a normal 2 person tent and share the load with somebody else. As I was travelling alone, I looked for a light one person option. Ended up ordering the Tarptent Protrail. Didn’t buy the poles, so the total weight is 740 grams. The pole-less setup meant I had to be a little creative when pitching it.
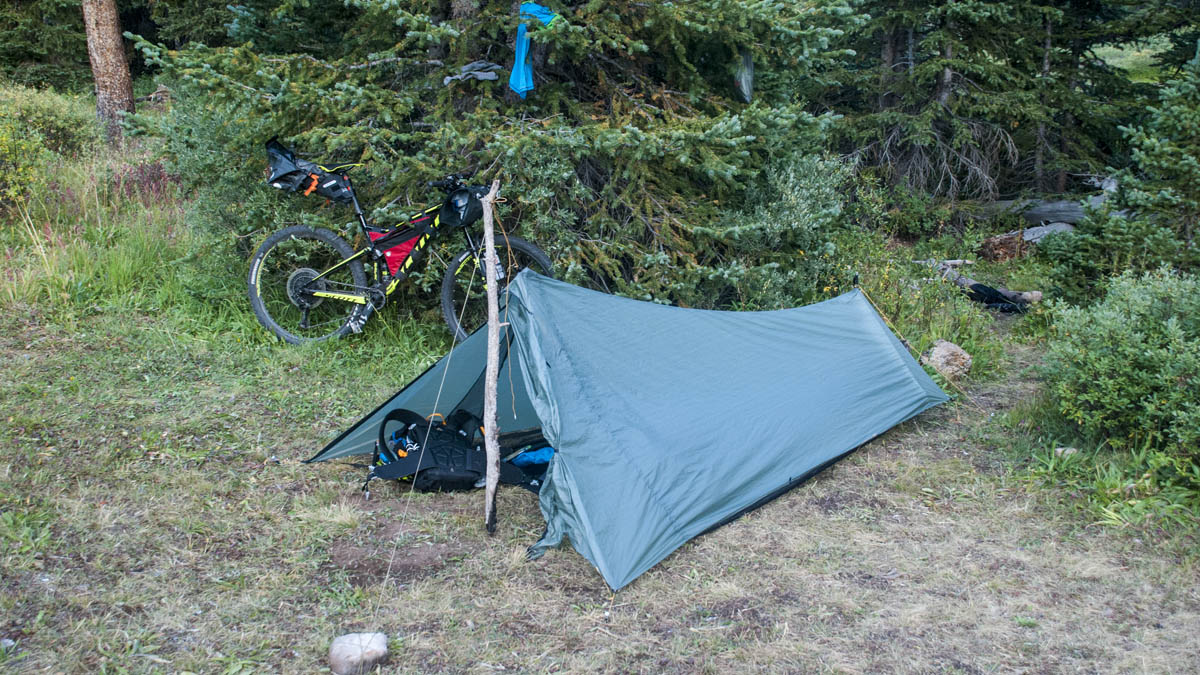
The tent is not waterproof, but they offer (for a few dollars) a seam sealing kit. Or they can seam seal it for you (for some more dollars). Hardly got any rain, but I’m sure it will handle it.
The tent was on the small side – well.. obviously. If I didn’t keep the front and rear storm flaps open, I’d get an awful amount of condensation inside. Even with them open I’d still get a little. Annoying if you’re using a down sleeping bag, especially since any move I’d make inside would have the sleeping bag touching the tent walls.
Cooking gear
Not a lot to say here. I don’t cook. I’m not emotionally attached to having warm food. I still went for a warm meal in the evening because:
- I wanted more food variety. In the evening I could eat things that are impossible to store and eat cold. Such as rice or pasta dishes.
- I managed to get very light gear. A very small Esbit stove, solid fuel and a metal cup. That was all.
Tried several brands of dehydrated food. There are some Knorr rice meals in supermarkets for about $1. Really cheap, but it takes more to have them cooked and they’re not that tasty. Flavored rice practically. In terms of specialty mountain food, the brand I liked most was Mountain House.
Water filtration
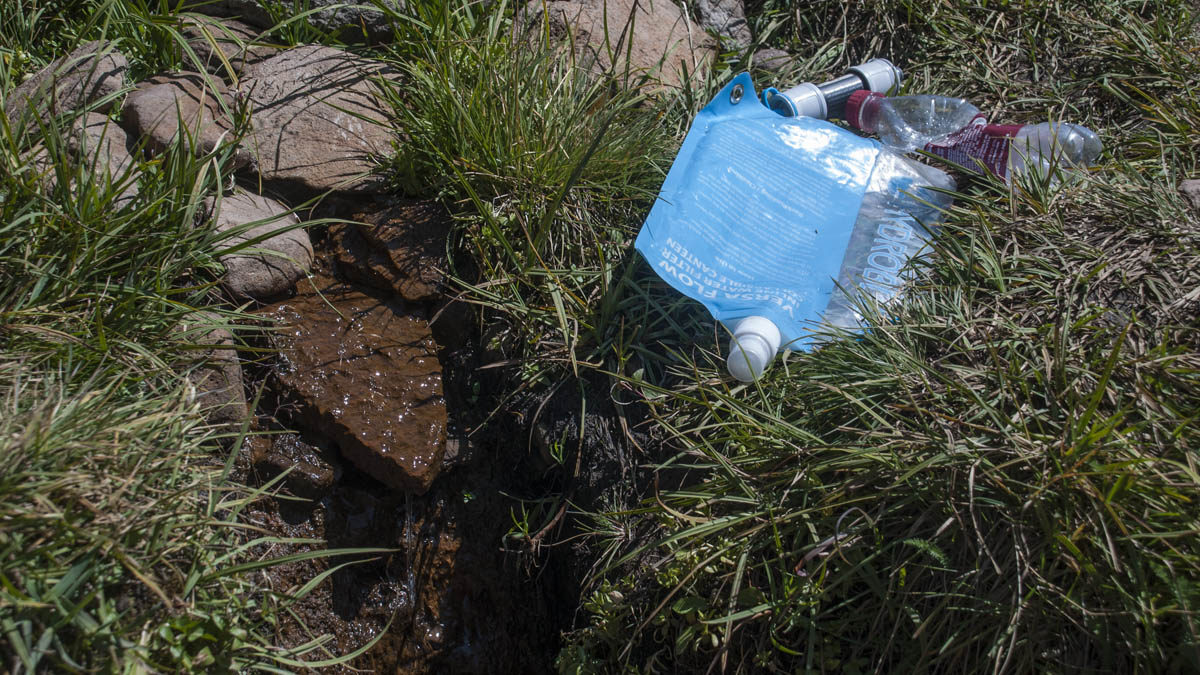
When you go up a mountain in Romania, every once in a while you see water simply gushing out of the ground. You know it’s safe – everybody’s been using it and nobody here caries a filter. The water situation in the States is quite different. You can have long stretches of trails where the only water source is a muddy pond or a small stream. A good filter becomes vital.
I went for the VersaFlow. Nothing bad to say about this filter. Lightweight. Got the job done. Quality piece of equipment.
 Clothes
Packed the following:
- 2 pairs of cycling shorts
- 2 technical tshirts: one synthetic and one wool
- 1 lightweight fleece – to be used while biking
- 1 down jacked – when not biking
- a pair of leg warmers – lighter than packing pants
- bad weather jacket (20.000 membrane) and waterproof pants
- a bunch of accessories: cycling gloves, cold weather gloves (useful!), a couple buffs, a couple pairs of socks
Not a lot of stuff. Pretty close to the bare minimum you can take on this trip without being at risk of freezing. No point in packing more – you’re still going to stink, but you’re also gonna carry some more stinky clothes in your pack.
Electronics
Packed the following:
- Garmin Etrex 20x GPS with a few spare batteries
- Phone with movies on it – makes for a relaxing evening
- Silva Cross Trail 3 headlamp. Also packed a set of front and rear bike lights as backup.
- Last but not least, my trusty DSLR, zoom lens and extra battery. Plus a small tripod – for the best selfies.
Looking back, there are two things I underestimated before the trip. The first one is how cold it can get. The lowest was about 0 degrees C. Still, I had good clothes and rarely had to use all of them at once. But I was also lucky to get very little rain and stay dry (who says global warming is bad?). The second was how tough the trail is. It can be done on a hardtail, but descending hundreds of vertical meters of roots and rocks and small drops is not what I’d call enjoyable. I’d say the bike I bought for this was a good fit for the job.